A Step-by-Step Guide to Repairing Rust Spots on Your Vehicle
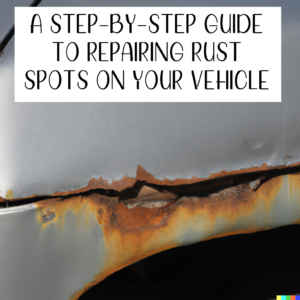 Rust spots on your vehicle can be an eyesore and, if left untreated, can lead to serious structural damage. However, fear not, as repairing these unsightly blemishes is not as daunting as it may seem. In this guide, we will walk you through a step-by-step process on how to repair rust spots on your vehicle, helping you restore its appearance and prevent further deterioration.
Materials You’ll Need:
Before we dive into the repair process, gather the following materials:
- Safety gear: Safety glasses, gloves, and a dust mask.
- Sandpaper: Various grits, ranging from 80 to 400.
- Rust converter or primer.
- Body filler (if needed).
- Putty knife or plastic spreader.
- Paint matching your vehicle’s color.
- Clear coat.
- Wax and grease remover.
- Rags or paper towels.
- Painter’s tape.
- Sander or sanding block.
- A well-ventilated workspace or garage.
Step 1: Safety First
Ensure you’re working in a well-ventilated area and wear safety glasses, gloves, and a dust mask to protect yourself from rust particles and chemical fumes.
Step 2: Assess the Damage
Examine the rust spots closely. If the rust is superficial and hasn’t created holes or significant damage, you can proceed with the repair. If the rust has caused severe structural damage, it’s best to consult a professional.
Step 3: Remove Loose Rust
Use coarse sandpaper (around 80-grit) to remove loose rust and paint around the affected area. Sand until you reach clean, bare metal. Make sure to feather the edges of the paint to blend it into the surrounding surface.
Step 4: Rust Converter
Apply a rust converter to the exposed metal surface according to the manufacturer’s instructions. This converts any remaining rust into a stable, paintable surface. Allow it to dry completely.
Step 5: Fill Any Holes
If there are holes or deep pitting in the metal, use a body filler to fill these imperfections. Follow the product’s instructions for mixing and application. Use a putty knife or plastic spreader to apply the filler evenly. Allow it to dry, and then sand it smooth with fine-grit sandpaper (around 220-grit).
Step 6: Sand Smooth
Sand the entire repaired area with progressively finer grits of sandpaper (e.g., 220, 320, 400) until the surface is smooth and even. Feather the edges to blend with the surrounding paint.
Step 7: Clean the Surface
Use wax and grease remover to clean the entire area thoroughly. This ensures a clean surface for painting.
Step 8: Apply Primer
Apply a high-quality automotive primer to the repaired area, following the manufacturer’s instructions. This creates a smooth base for the paint to adhere to. Allow it to dry completely.
Step 9: Paint
Spray several coats of paint that match your vehicle’s color onto the primed area, allowing each coat to dry before applying the next. Use light, even strokes to achieve a seamless finish.
Step 10: Clear Coat
Apply a clear coat over the freshly painted area to protect it and give it a glossy finish. Follow the paint manufacturer’s recommendations for drying times and coats.
Step 11: Final Touches
Once everything is dry, carefully remove any painter’s tape. Inspect the repair to ensure it matches the surrounding paint and is smooth and even.
Step 12: Wax and Polish
To blend the repaired area with the rest of the car’s finish, wax and polish the entire vehicle. This will help maintain a consistent appearance and protect your car’s paint.
 Visit Myrtle Beach Detailing for Help
Repairing rust spots on your vehicle can be a rewarding DIY project, saving you money and preserving the appearance and structural integrity of your car. Remember that proper preparation and attention to detail are key to achieving a professional-looking result. If you’re not confident in your abilities, or if the rust damage is extensive, it’s always a good idea to consult with a professional auto body shop to ensure a thorough and lasting repair.